Track Every Billable Hour. Invoice with Confidence.
Designed for small service businesses, PlanArty gives team leads a clear view of billable time, team capacity, and project profitability — without the wasted time and frustration of big platforms.
- No credit card required
- Join other service businesses who trust PlanArty

Your All-in-One Solution for Profitability and Clarity
PlanArty is purpose-built to solve the core operational challenges that cost service businesses time and money.
Stop Leaking Profit from Lost Billable Hours
Manual timesheets, scattered notes, and forgotten entries cost businesses real money. Even a few missed hours each week can add up to thousands lost every year.
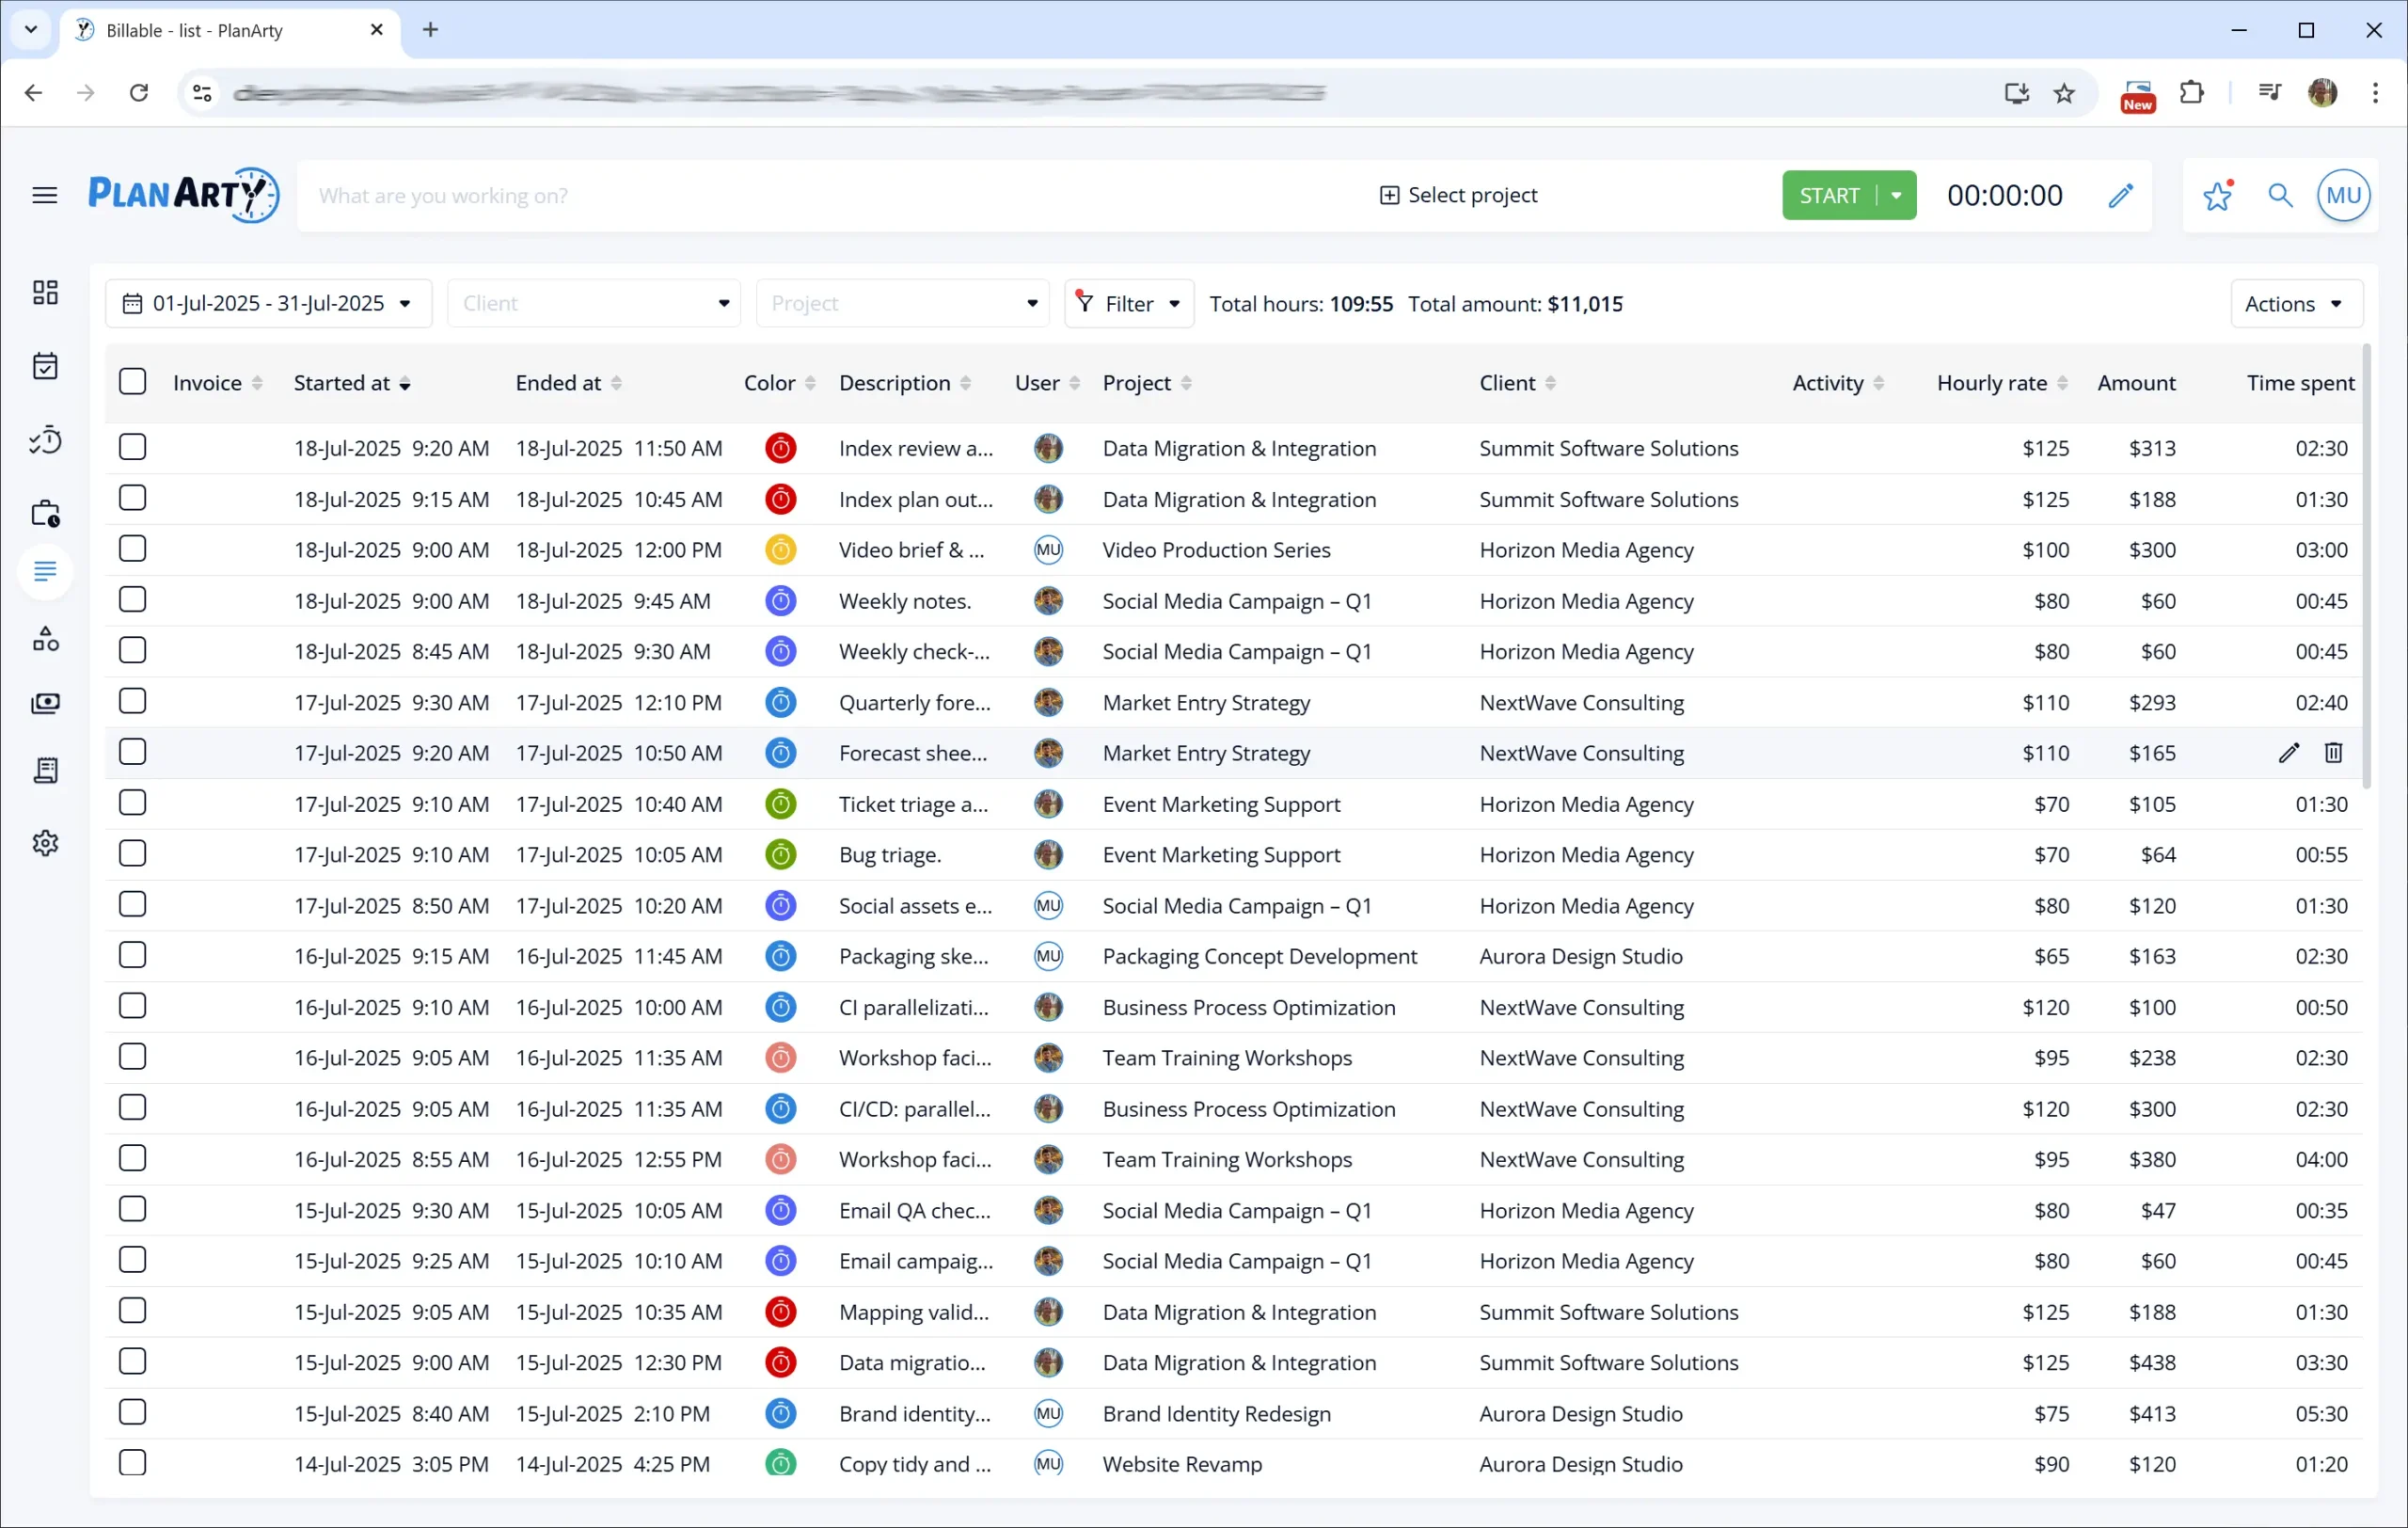
PlanArty makes time tracking effortless for every team member. Every billable minute is logged, organized by project and client, so you can invoice with complete accuracy and capture the full value of your team’s work.
The Hidden Cost of Unbilled Time
For a busy service business, an hour of lost time from an unnecessary meeting or a miscommunication doesn’t sound like much — until you add it up.
Let’s do the math.
Imagine a team of 10 people losing just one billable hour each per week. At a conservative $50/hour rate, that’s over $2,000 in lost revenue every month.
That’s $24,000 in pure profit lost every single year.
That’s not a rounding error. That’s the cost of a new key hire, a critical marketing campaign, or your entire annual software budget.
A Simple, 3‑Step Path to Confident Billing
1
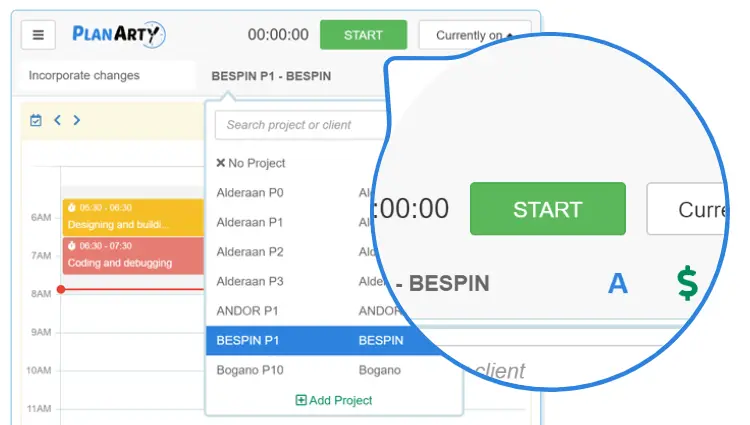
Track with Ease
With a single click, any team member can start a timer. Every entry is automatically organized, ensuring no billable minute is ever lost.
2
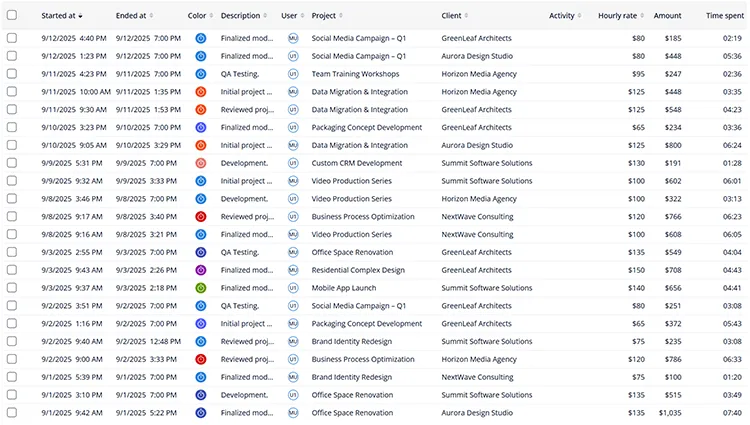
Review for Accuracy
Get a clear, centralized view of all your team’s logged time. Quickly review entries and ensure every timesheet is perfect before you bill.
3
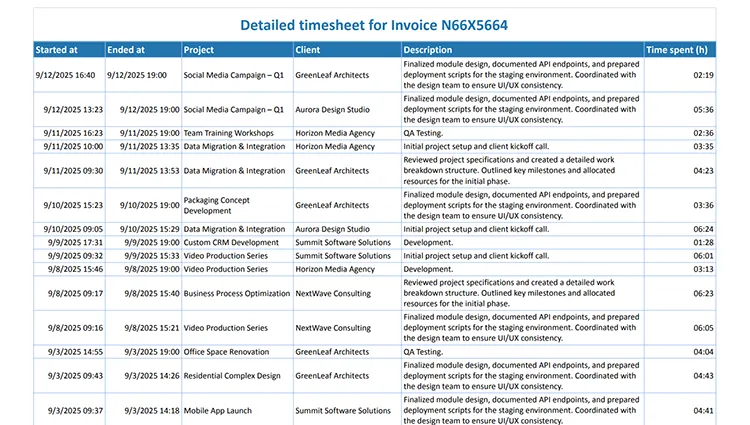
Export with Proof
Export a detailed, professional report. Attach it to your invoice to provide 100% transparency and get paid faster.
This is the simple overview. Want to see the detailed breakdown?
More Than Just a Time Tracker
Simple Project Planning
Break down projects into clear, actionable steps. Create accurate estimates to price your work with precision before you begin.
Team Capacity Overview
See your team’s entire workload at a glance. Understand who’s busy and who’s available to ensure workloads are balanced and deadlines are met.
Plus, use Someday Tasks to capture important future to-dos and assign Daily/Weekly Tasks to keep your team aligned without a rigid schedule.
WHY PLANARTY
Clarity, Not Clutter
Your business doesn’t need another massive platform packed with unused features. We’re not the overstuffed toolbox, we’re the precision instrument. An expertly designed tool built to do one job perfectly: protect your profitability.
With PlanArty, simplicity isn’t a limitation. It’s the reason your team will actually use it — and why you’ll start seeing results from day one.
What you’ll notice first
- Fast onboarding — minutes, not weeks
- A clean interface your team won’t resist
- Reports that make invoicing effortless
What Our Clients Say
Gyarmati Attila
PlanArty made it easy to keep track of every working hour and gave me the confidence that my invoices reflect all my effort.
Your Data is Safe and Secure
All data between you and PlanArty is fully SSL Encrypted.
We use Amazon’s world-class, secure AWS Infrastructure.
We are fully compliant with modern data privacy regulations like GDPR.
Your data is protected with Daily Backups, so your hard work is never lost.
Our Vision: The Profit Intelligence Platform
We believe accurate billable hour tracking is just the beginning. Our mission is to evolve PlanArty into a simple, powerful Profit Intelligence platform that helps you answer your most critical business questions: “Which clients are my most profitable?” and “How can I improve my team’s efficiency?”
The Founder’s Core Systems
Billable Hours: The Founder’s 5-Step Playbook
Stop the anxiety of “Excel Hell.” Read Istvan’s personal story of discovering the three silent profit leaks and the exact 5-step system he engineered to fix them.
The “Fair Queue” Script: How to Handle “Urgent” Client Requests Without Chaos
Why we refuse to let “emergency” interruptions kill our team’s focus—and how we get clients to thank us for it.
Why We Stopped Emailing Tasks And Started Handing Them Off
Everyone says ‘Async’ work is efficient. We found it caused expensive errors. Discover the 3-step manual handoff protocol we use to stop ticket pong and save profit.
Ready to See Your Business More Clearly?
Start your free, no-risk trial today. Get set up in minutes and see exactly where your time is going.
No credit card required • Cancel anytime